Setting up a PPTP Client on Windows XP
This is super easy, and you only have to type one piece of information the entire time!
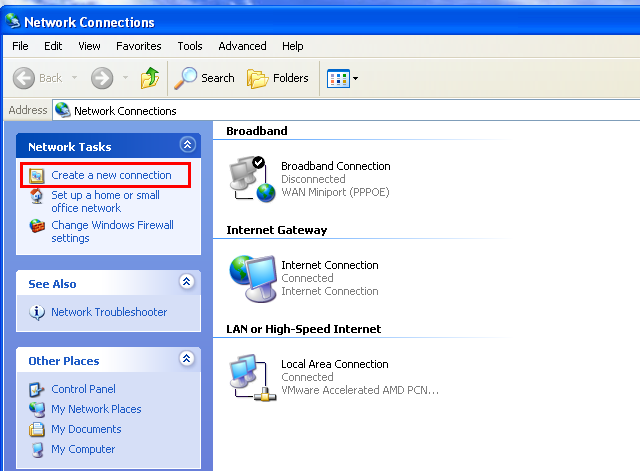
Start by accessing the Network Connections Panel.
Click “Create New Connection” in the left hand column of the “Network Connections” window.
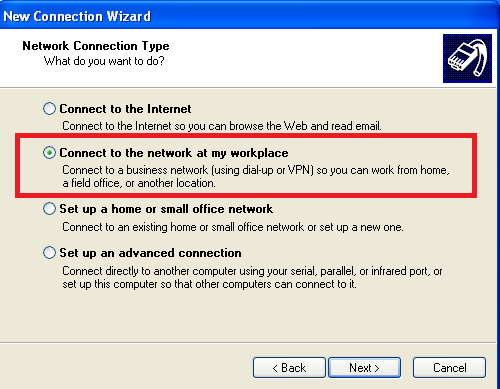
You are now presented with a Wizard. Click Next to continue.

Select “Connect to the Network at my Workplace” from the menu
Select Virtual Private Network connection from the next panel

Input Name the connection

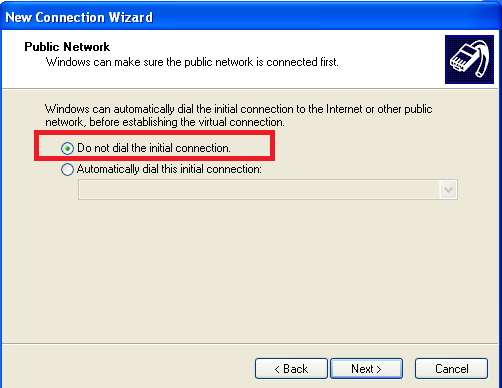
Select “Do not dial the initial connection” from the next panel
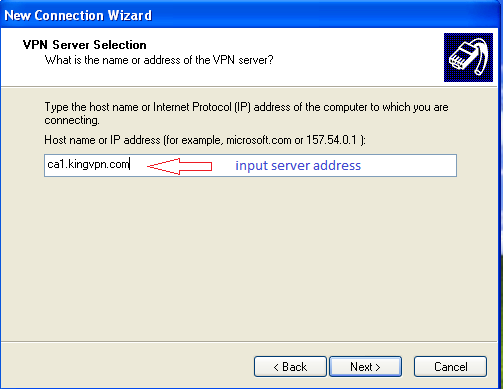
Now enter the IP or FQDN of the PPTP Server. (This can be any of the configured interfaces)
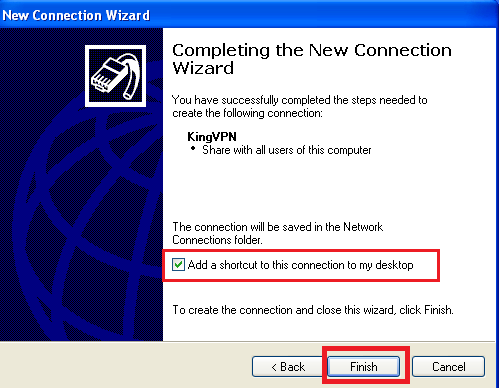
Next you can either just finish or add a shortcut to the desktop. You are nearly done!
When you launch the client for the first time you will be asked for a username and password. Click connect when you are done with this and if all goes well you will connect to the PPTP Server.

Please enter username and password provided by KingVPN
Optionally, click ‘Save Password’ to save your password as part of the connection
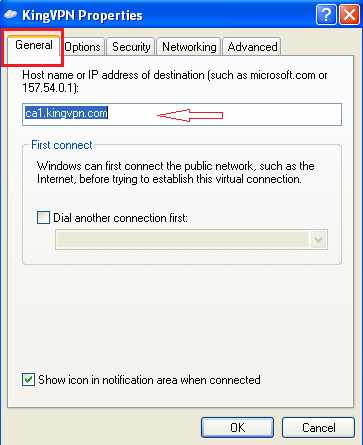
Before you click on the connect, you must select properties to open the properties window.

Select the General tab and in the Specified location you can input or change server address
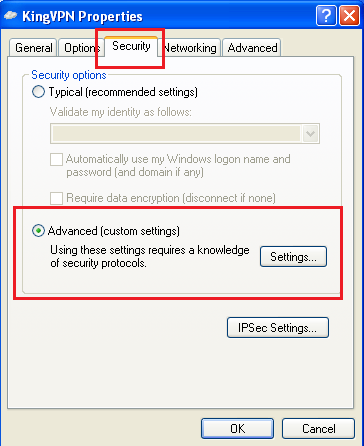
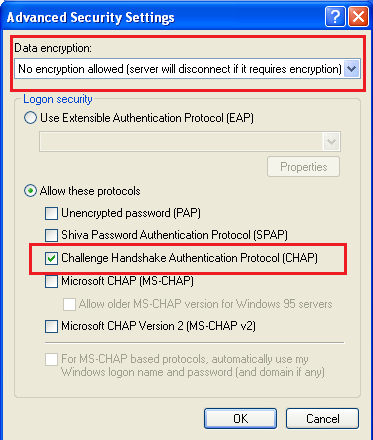
In the Security tab , choose the “Advanced (custom setting ) ” and then click on the setting button
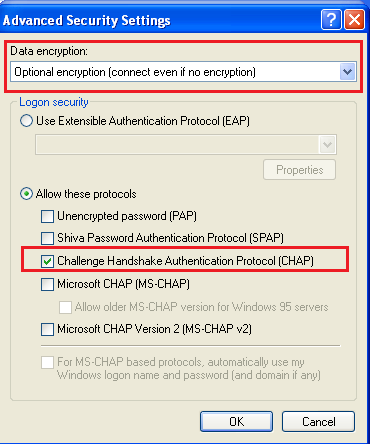
In the “Data encryption” drop down list, choose “Optional encryption (connect even if no encryption)” or “No encryption allowed”
Then select the “Challenge Handshake Authentication Protocol(CHAP)” at Allow these protocols radio button
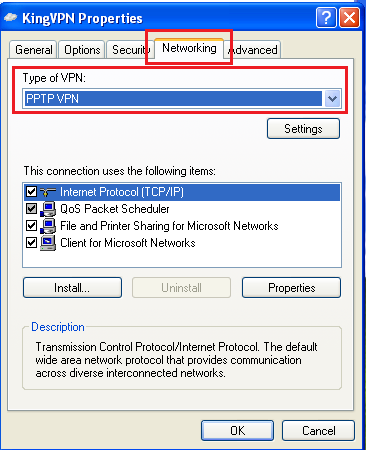
Select the Networking tab and in the “Type of VPN” drop down list, choose PPTP VPN
And then click on the OK
Enter your username and password and click Connect.


After the authentication process is complete, you will be logged on to the VPN Server and two computers will appear at the bottom right hand corner of your screen (default).
Congratulations! You have now successfully been connected to the VPN server.
You can see servers address here